709-218-7927 The Landfall Garden House 60 Canon Bayley Road Bonavista, Newfoundland CANADA A0C 1B0 |
|
|---|
.JPG)
The First Rack
Friday, March 22, 2024

The cable and pulleys are for the portable winch/plough project.
The sheet of mesh cost me $14. “ DUCHESNE 6" x 6" 6 Gauge Construction Mesh - 4' x 8'“
Eight pieces of 3x1 8’ spruce cost me $14 (I used five)
Delivery $25; add in 15% tax, came to $cdn61.
The shed is crowded but the driveway is clear, so I shall lay out the 3x1 and the mesh on the driveway and start making a sandwich.
I have found a 90” long roll of 36” 1cm mesh which I can use as my first mat.
I might do a quick stocktaking of what other mesh I have, although I suspect that it is all 36” wide.
Sunday, March 31, 2024
Today is national First Attempt Day.
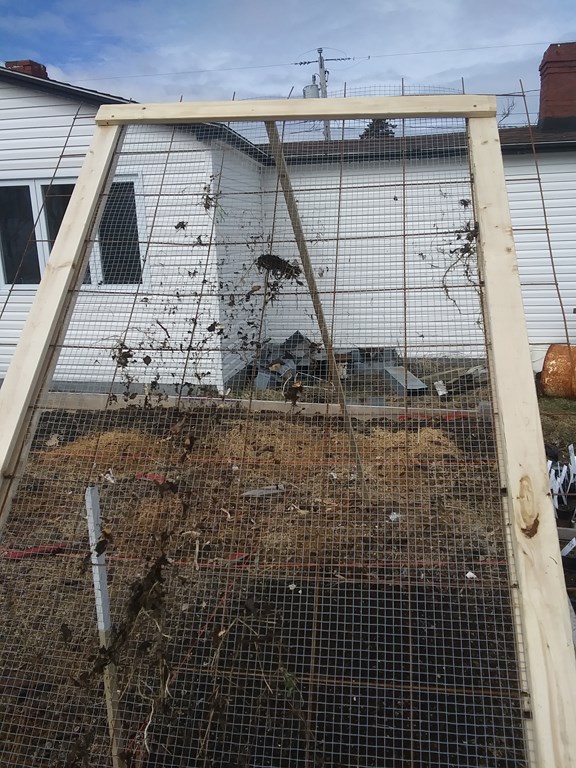
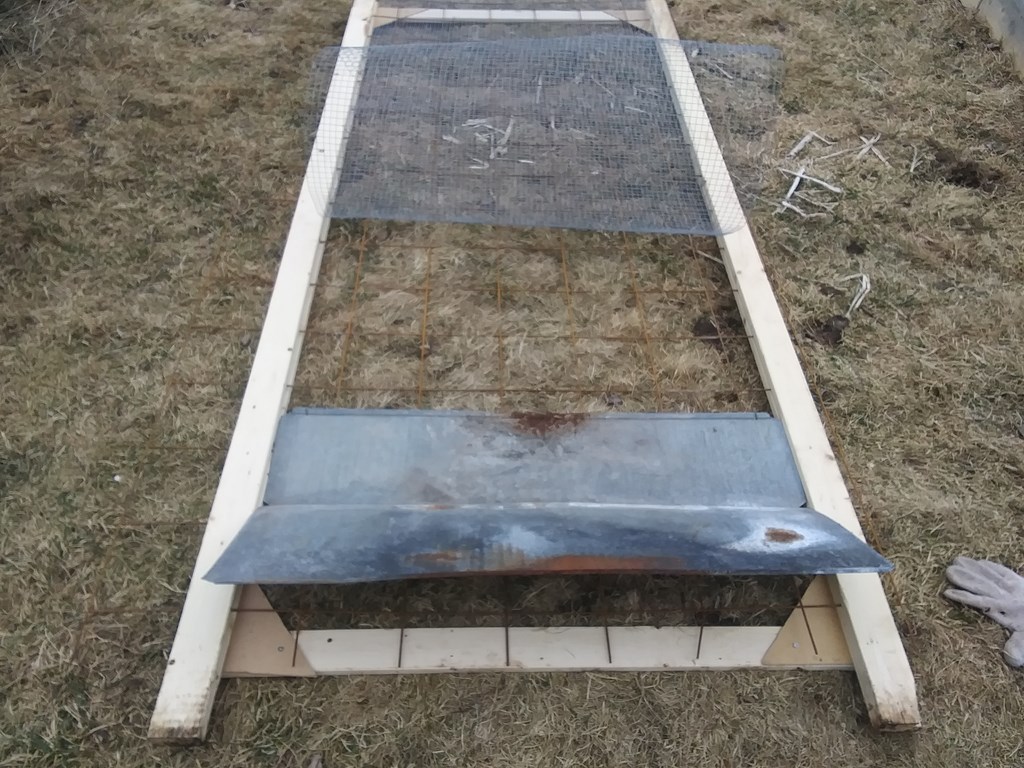
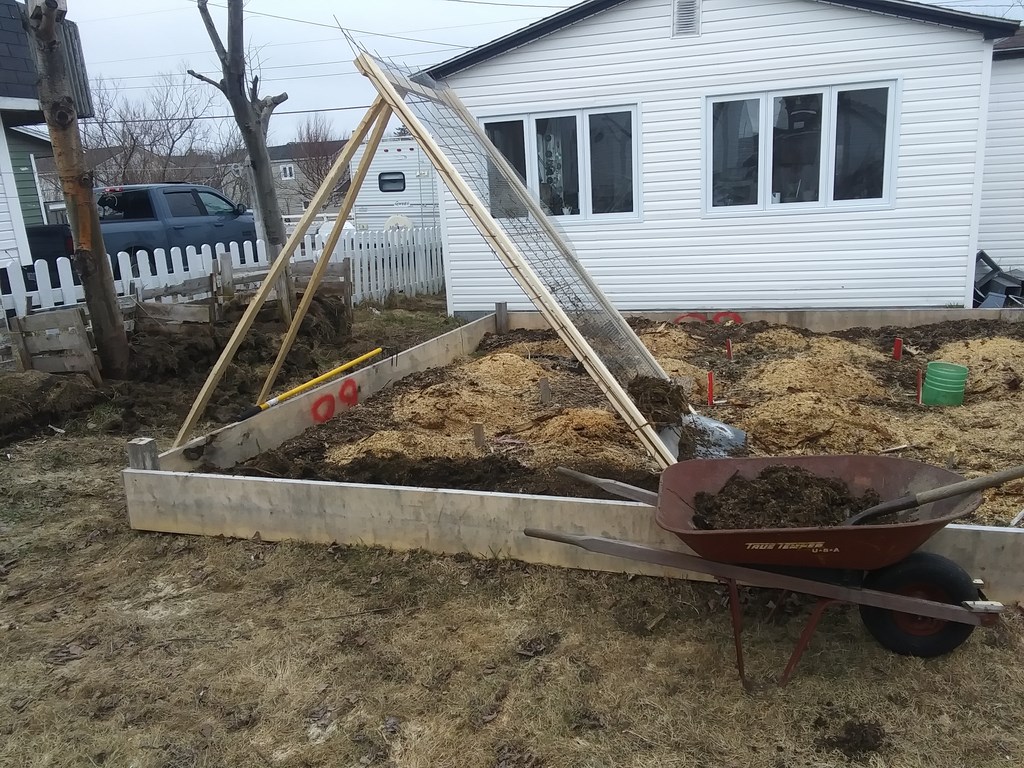
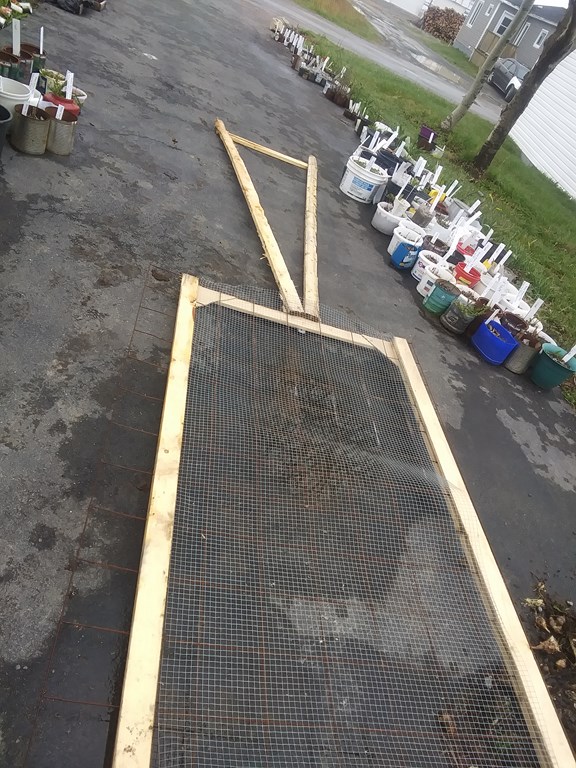
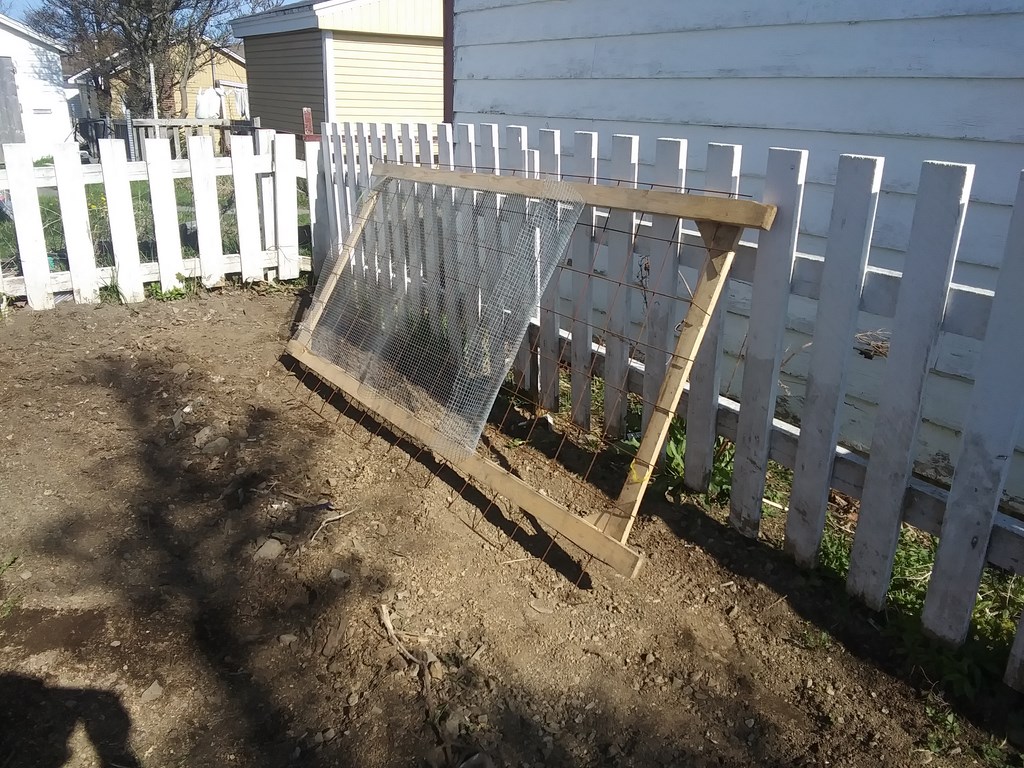
Here is the result of a tacked-together (that is, non-final) propped rack.
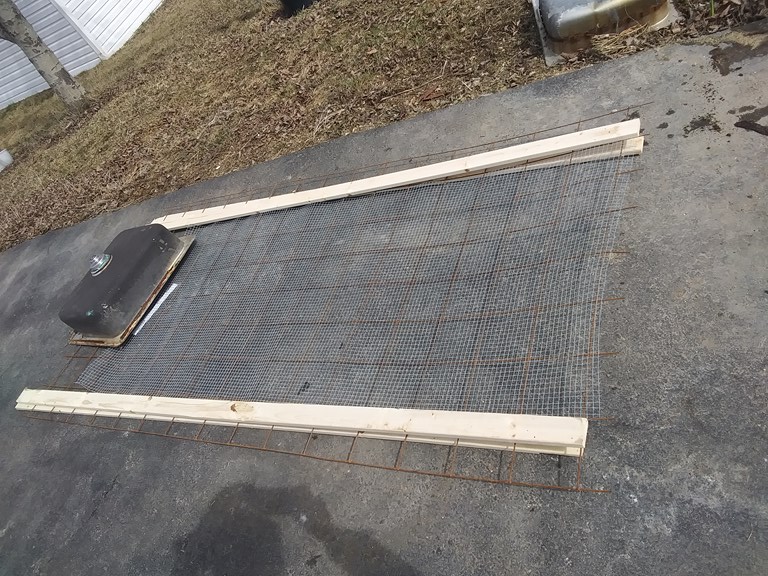
On the driveway I laid out two verticals, the construction mesh (four-inch centres), and a roll of one-centimetre mesh as a mat.
Everything including the kitchen sink which doubles as a paper-weight.
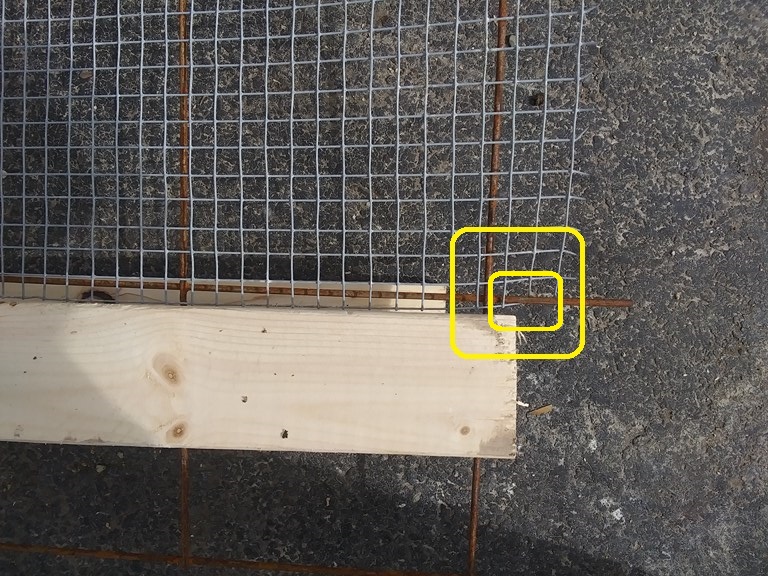
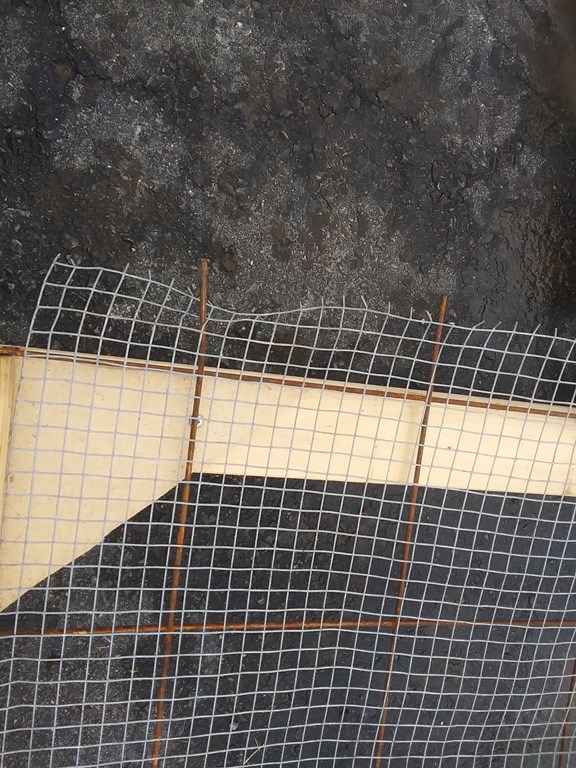
Here is the first corner, with the timber not yet aligned.
The two planks sandwich the construction mesh, and the mat is anchored over the projecting ends of the construction mesh.
I will almost certainly dis-assemble the rack within the next two days and rebuild it, using more than four wood screws(!)
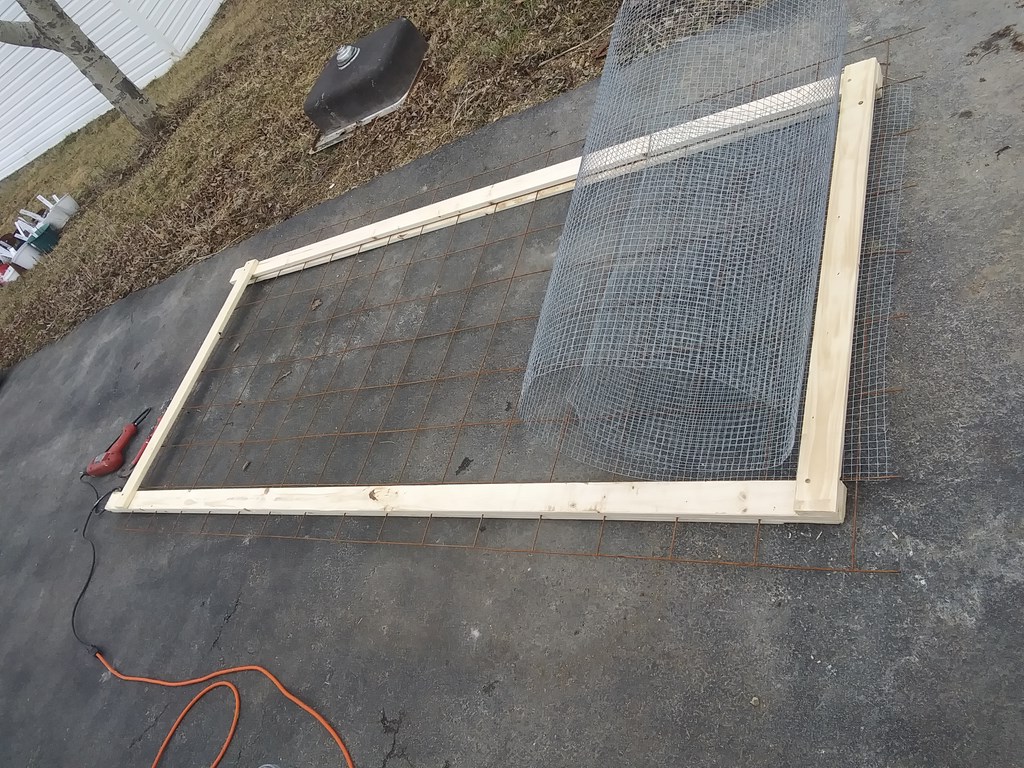
Here the planks are laid without fasteners. The coiled mesh has coiled itself up. Again.
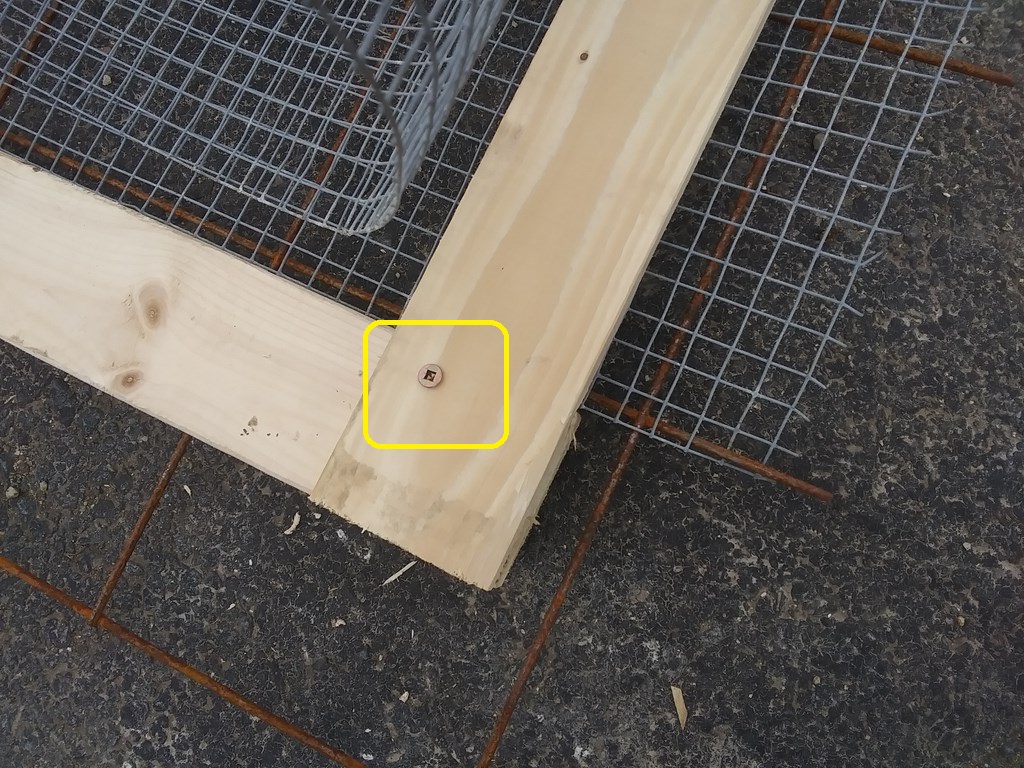
I take a Brave First Step and drill one hole, hammer one screw through the three planks, and screw it home. Phew!
I was taught to hammer screws.
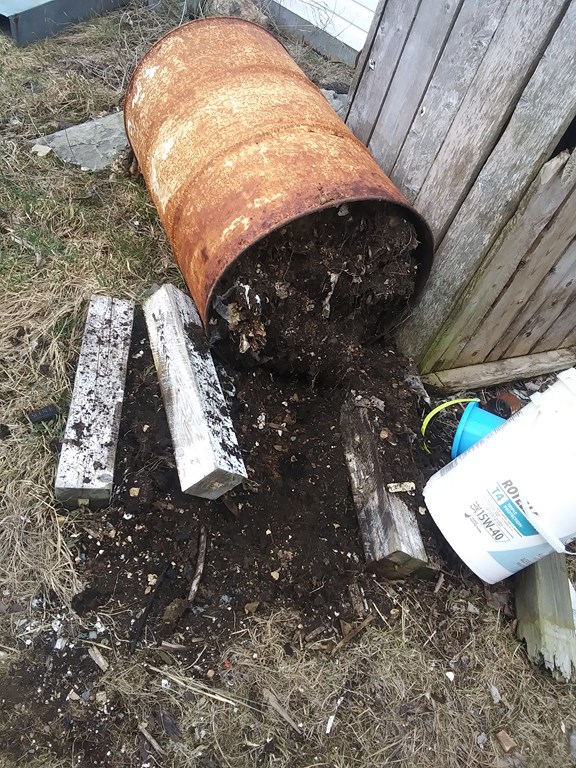
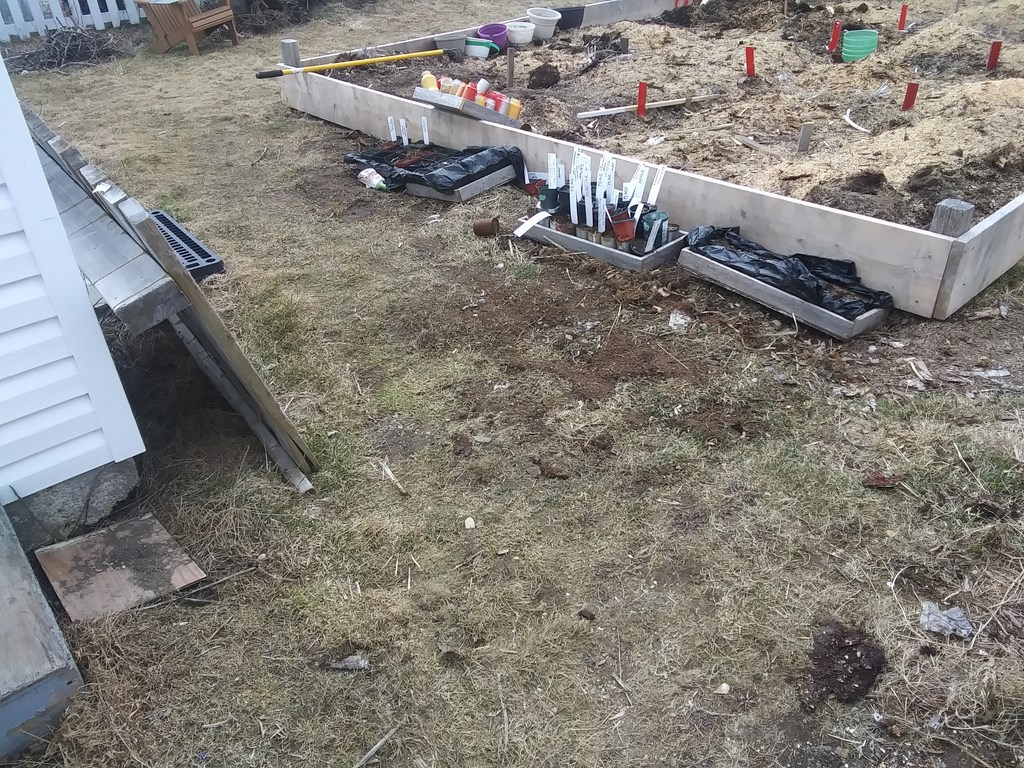
My 44-gallon drum was blown over by wind gusts on Tuesday, December 12, 2023. I use that as a trial load to be sieved.
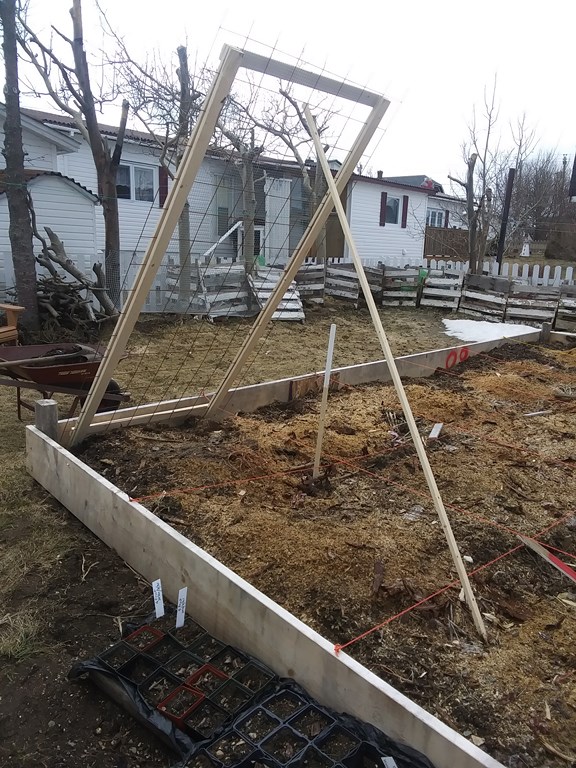
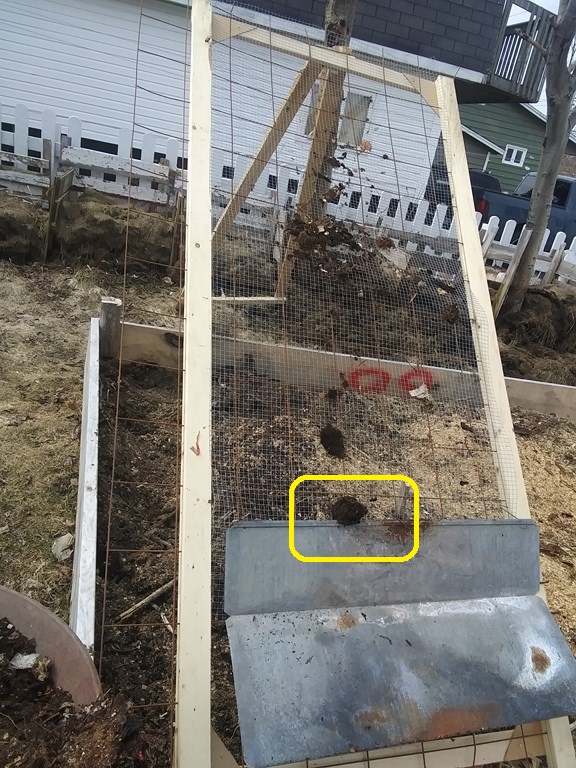
The rack is propped up at an angle of about sixty degrees, with a frail prop. Yes, it fell over once.

I did not cut the construction mesh; it remains at its four-foot width. The coil of fine mesh unrolls to about half-way down the rack. That will soon change.

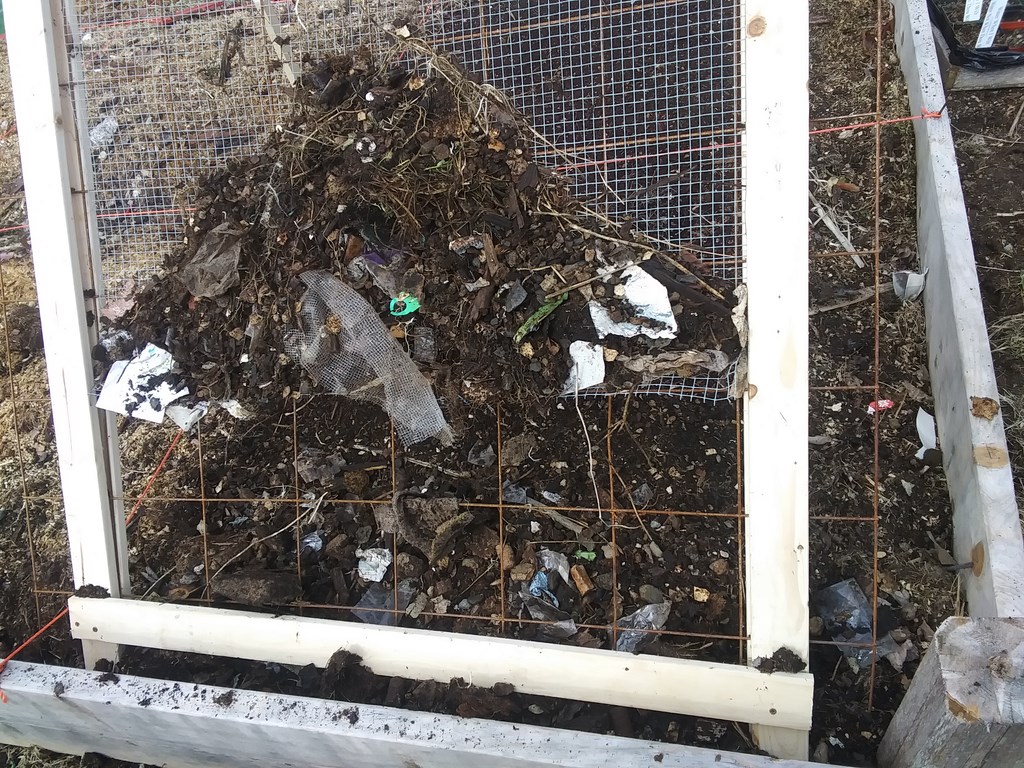
My first wheel-barrow load of soil. Note shreds of plastic, turkey thighs, pebbles etc. I toss everything into the bin and let the bacteria and the worms sort it all out.

The first barrow load sieved. A thin layer of sieved soil covers the sawdust from last fall.
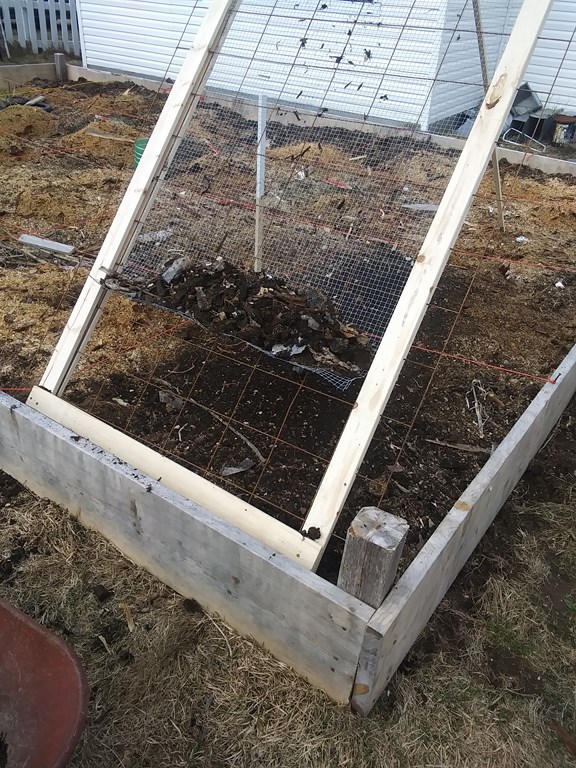
The fine mesh has started to uncoil under the burden of coarse material that does not fall through the mesh.
All the soil is wet and clumpy which means:-
(a) The clumps stick together and deliver much coarse material at the foot of the mesh
(b) There is no problem with blowing dust.
My enthusiasm got the better of me. I will add sheets of plywood to surround the top, otherwise I am tossing (enthusiastically) shovelfuls of soil outside the sieve.
Sometimes soil clings to the top of the mesh. That will dry out and fall through with the next load, or the next rainfall, whichever comes first.
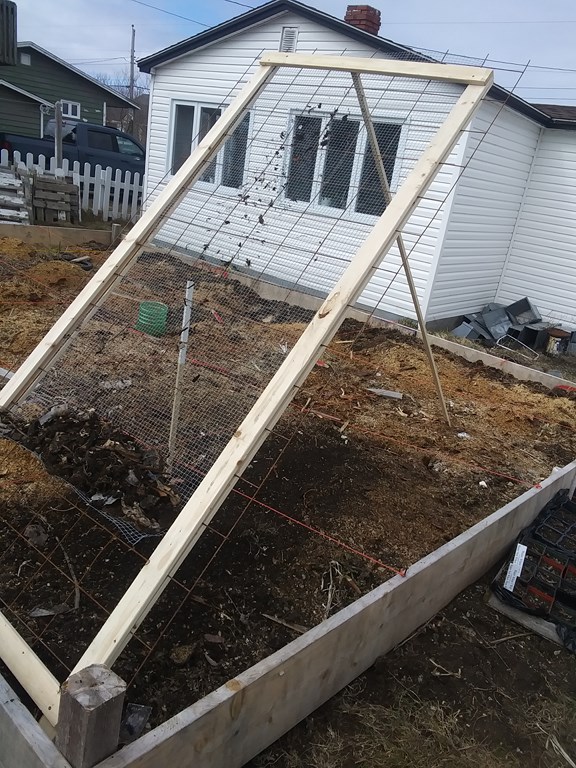
The fine mesh has unrolled, and will, day by day, gradually flatten out.
When I rebuild this frame, the mats can be hooked over the top of the wooden frame from the outside, instead of being trapping within the sandwich.
I plan to use triangular sheets of Masonite or plywood to maintain the right-angles of the frame.
Too I might use a sheet of galvanized steel to divert coarse material off the mesh and outside the bed. Then a separate task will be collecting the coarse material and barrowing it back to a cubic-metre bay.
Friday, April 05, 2024
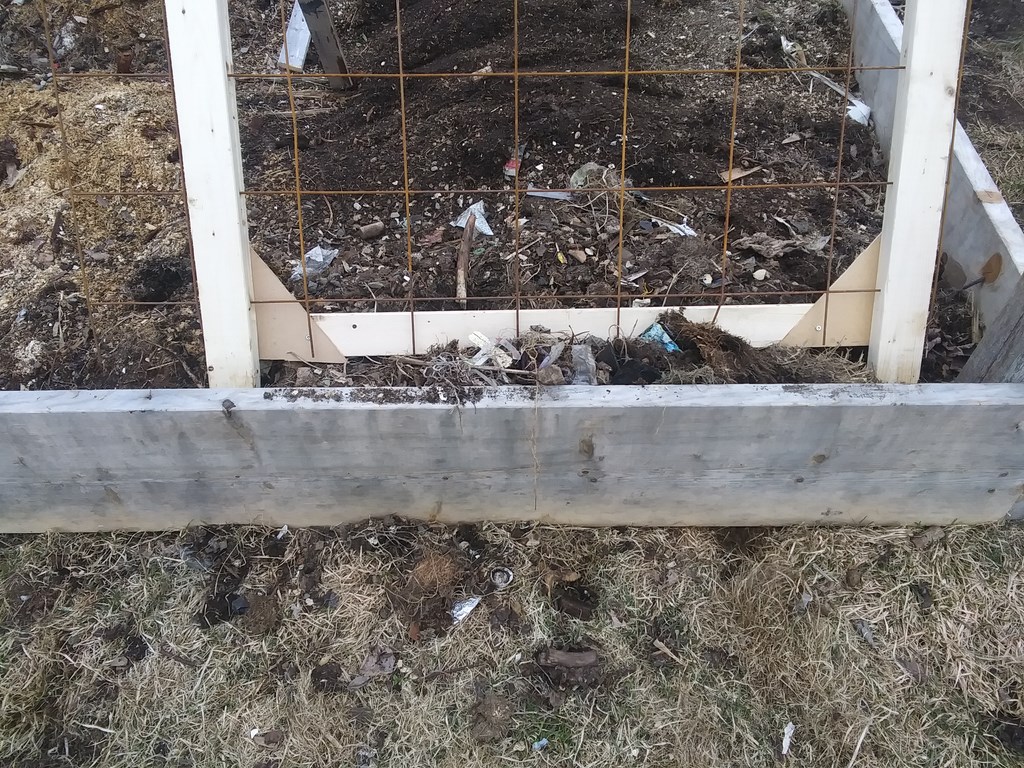
Today I added features to the rack. I had to disassemble the rack one corner at a time, and used the opportunity to extract the mat from the sandwich. The mat now floats free, although it is hooked over two of the projecting mesh rods at the top of the rack
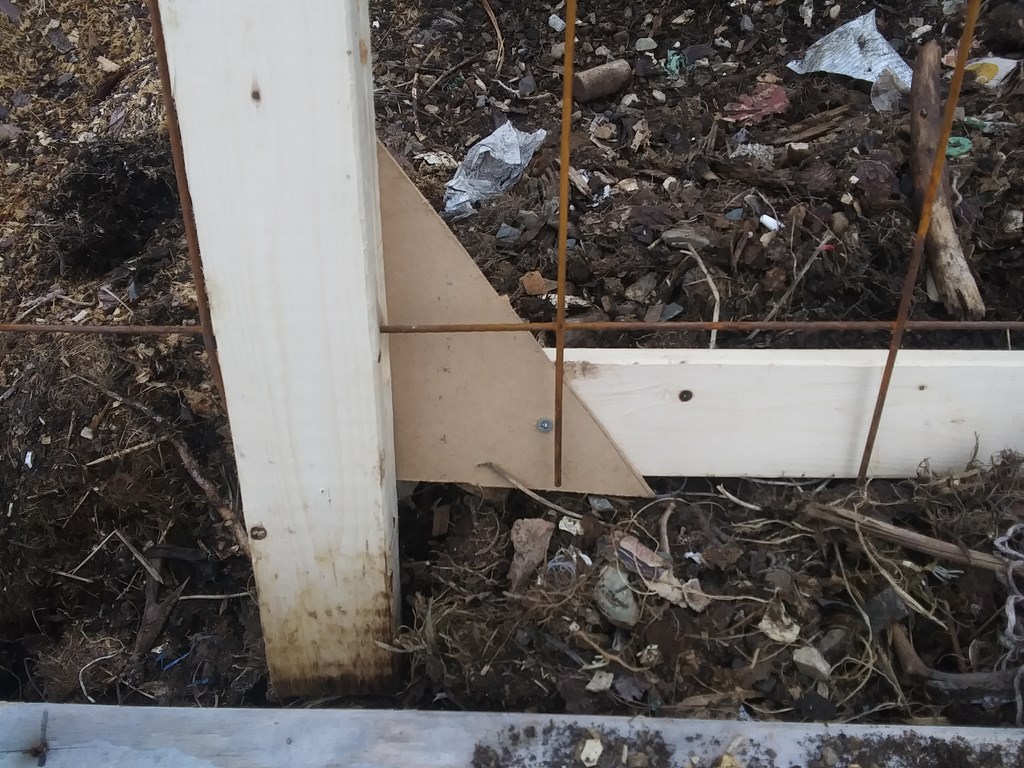
First I strengthened the joints with triangular plates of thin sheet wood. The screw you see at the right-hand apex of this triangle is duplicated on the hidden (top) apex from the other side, and the original two-inch screw has been set through both planks, sandwiching the plate.
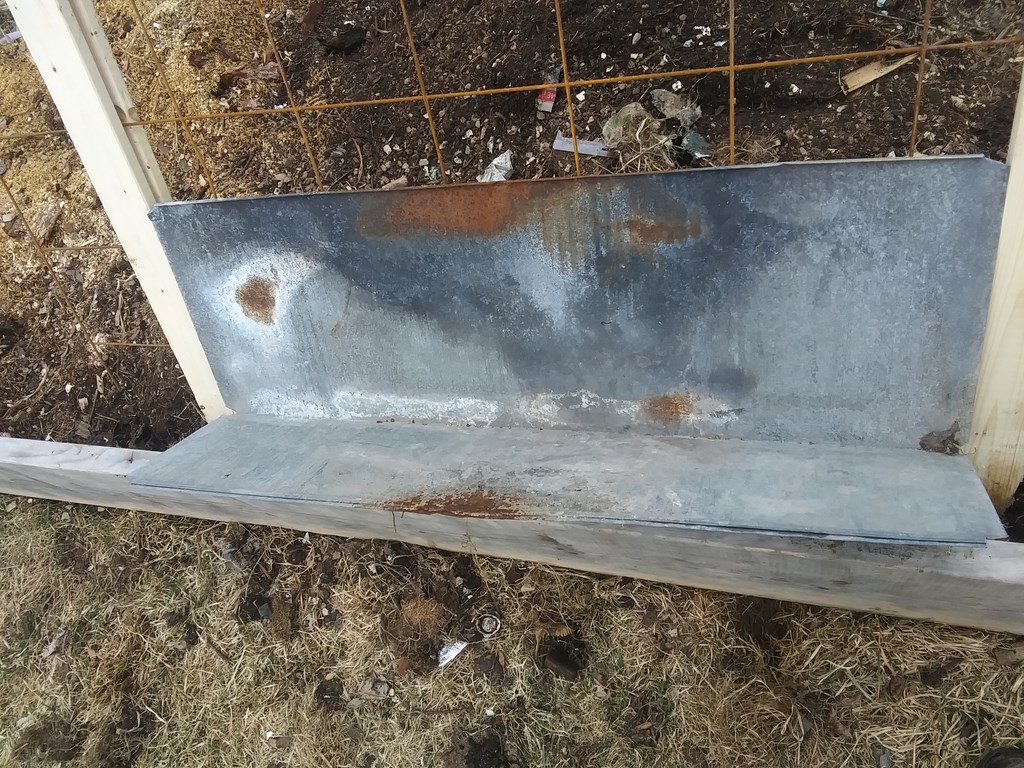
One of my pieces of duct work is flattened out a bit and will become a chute to channel coarse material away from the bottom of the mat.
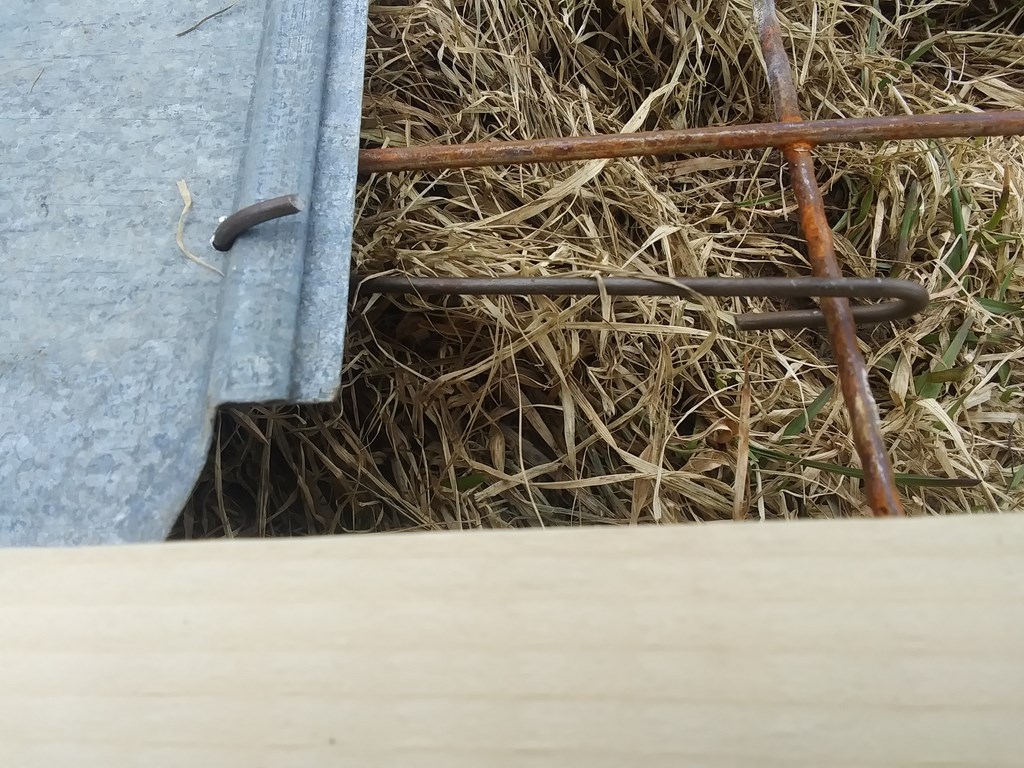
The chute uses three home-made S-hooks which suspend the chute from the construction mesh.
My theory is that I can hook the mat higher up on the rack, leaving a shorter length of mat on the rack, and re-hook the chute higher up the mat, at an angle, so that the coarse material slides down the chute into a waiting barrow. We’ll see!
Ready to go! The mat mesh still curls up, but that is not a problem during transport.
I dug out part of the first two plots to weight down the mat with debris. I took three barrows of these plots to start filling in the hole at the north end of the eastern driveway bed.
The chute is not complete. Right now all it does is carry away coarse material from the foot of the mat.
In this image you can see the triangular leg I made from scrappy timber.
The angle can be adjusted by moving the foot of the leg to and from the rack. Wetter soil seems to need a shallower angle of rack, so I take the legs further away.
I think I can now start sieving soil on a daily basis, moving the rack around the bed as I go.
Saturday, April 06, 2024
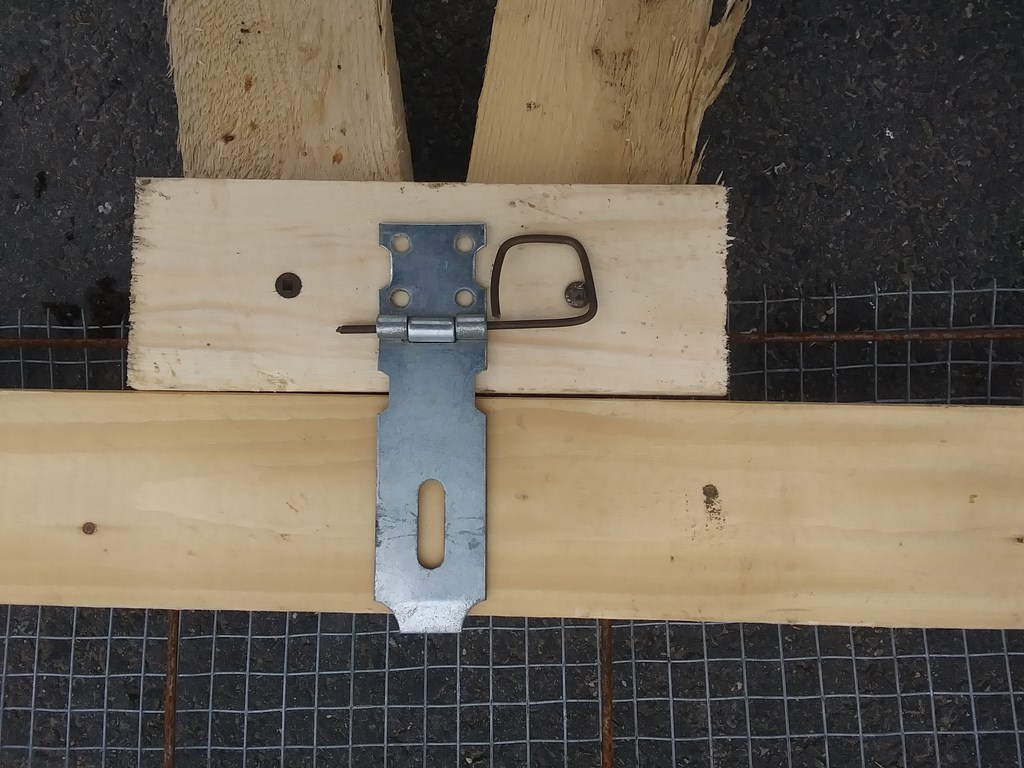
Today’s tweak: Hinge the prop to the rack, using a drop-pin hinge.
Drop-pin hinge (I learned this from St Anne’s Music And Drama Society while engaged in set construction). Take a regular hinge, grind off one head of the pin. Remove the pin, and replace it with a piece of coat-hanger wire with a finger-loop at one end.
Remember that a design constraint for all these sieves was to be able to dis-assemble them easily for flat storage over winter.
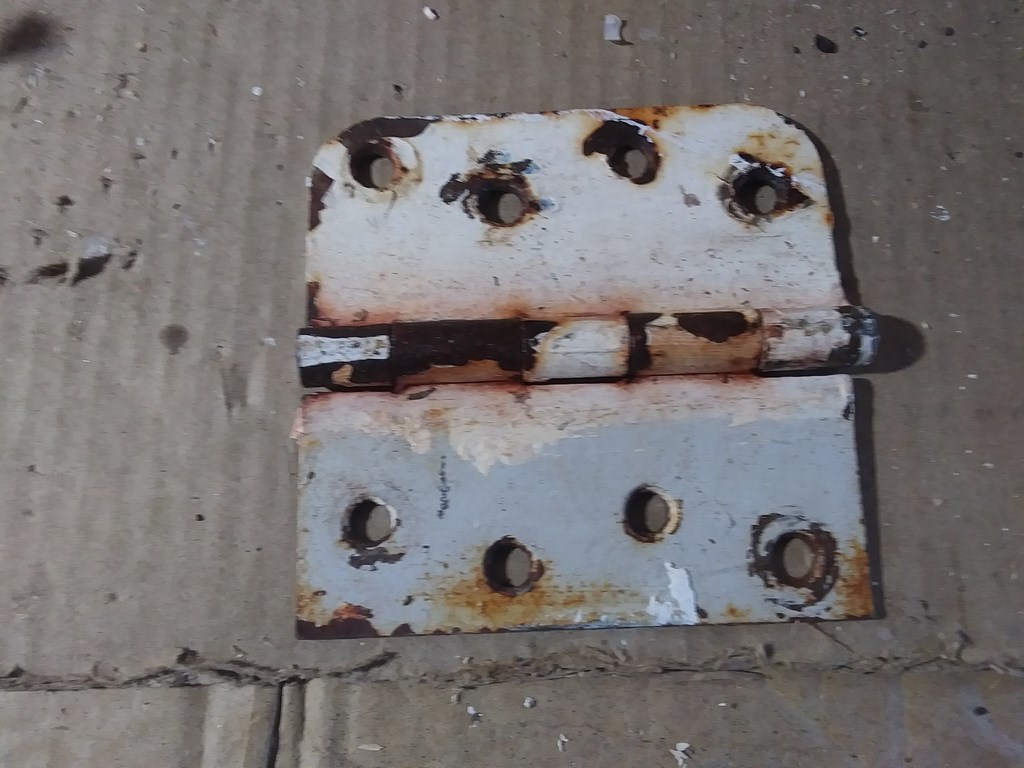
I tried first with an old door hinge. The left-hand side of this image indicates that I have ground off one head of the pin, but I was still unable to hammer out the pin.
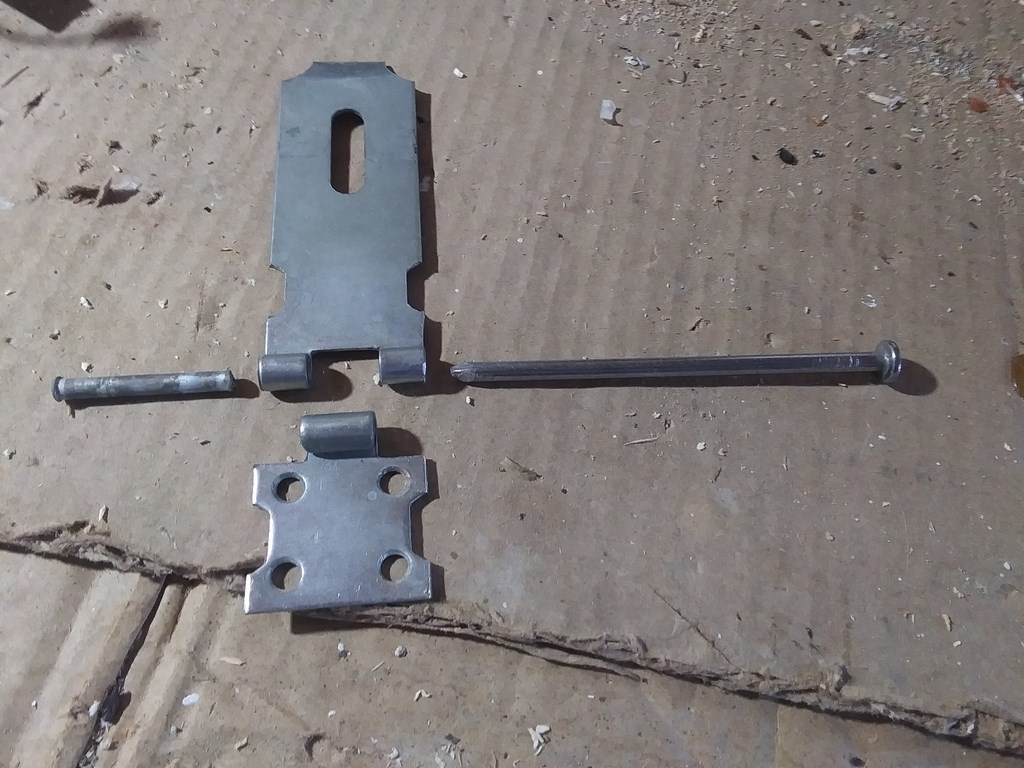
So I switched to a newer hinge – part of a hinge and hasp set. At the right-hand end I have ground off the head, and used a stout nail to push the pin out.
A piece of coat hanger makes an ideal pin with a finger-loop at one end.
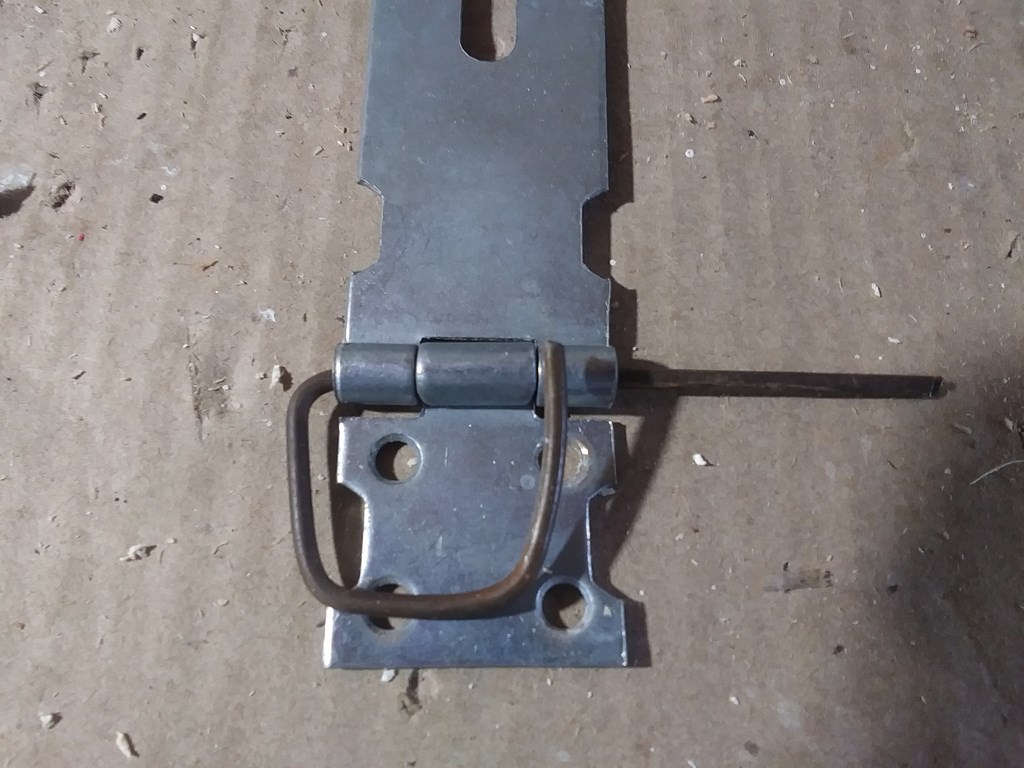
So you think this is a good arrangement? Look again! The hinging part does not lie between the prop and the rack; it lies inside the prop, and will not hinge at all!
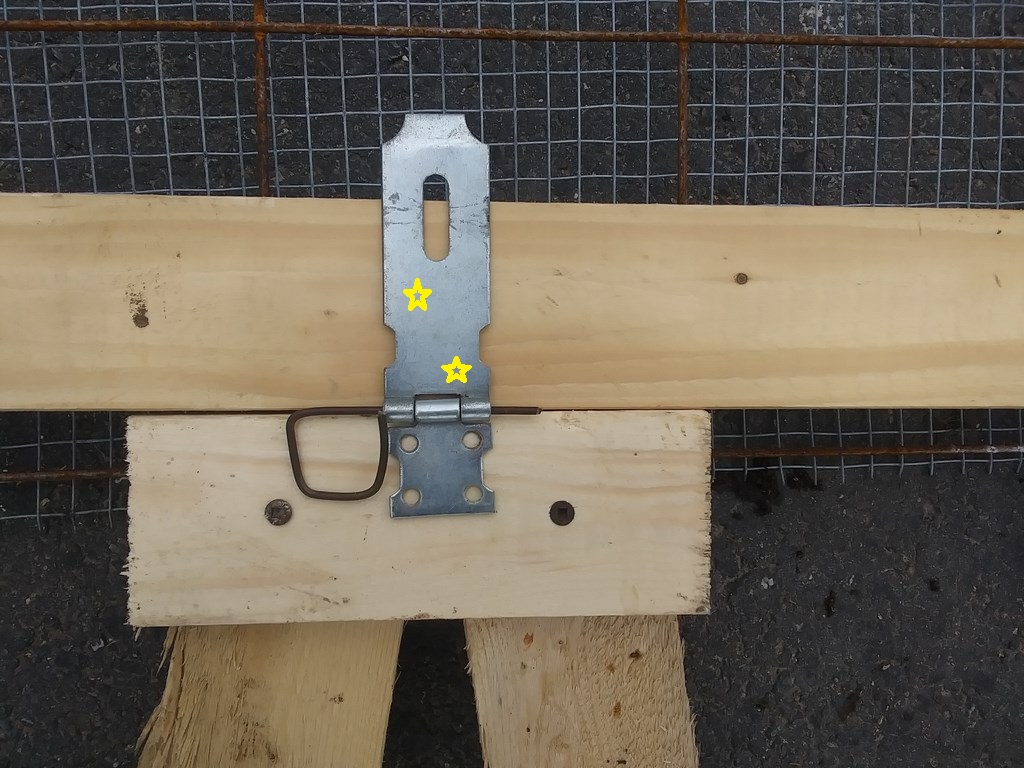
I align the hinge with the gap between the prop and the rack. I will need to drill at least two new holes for screws in the longer section.
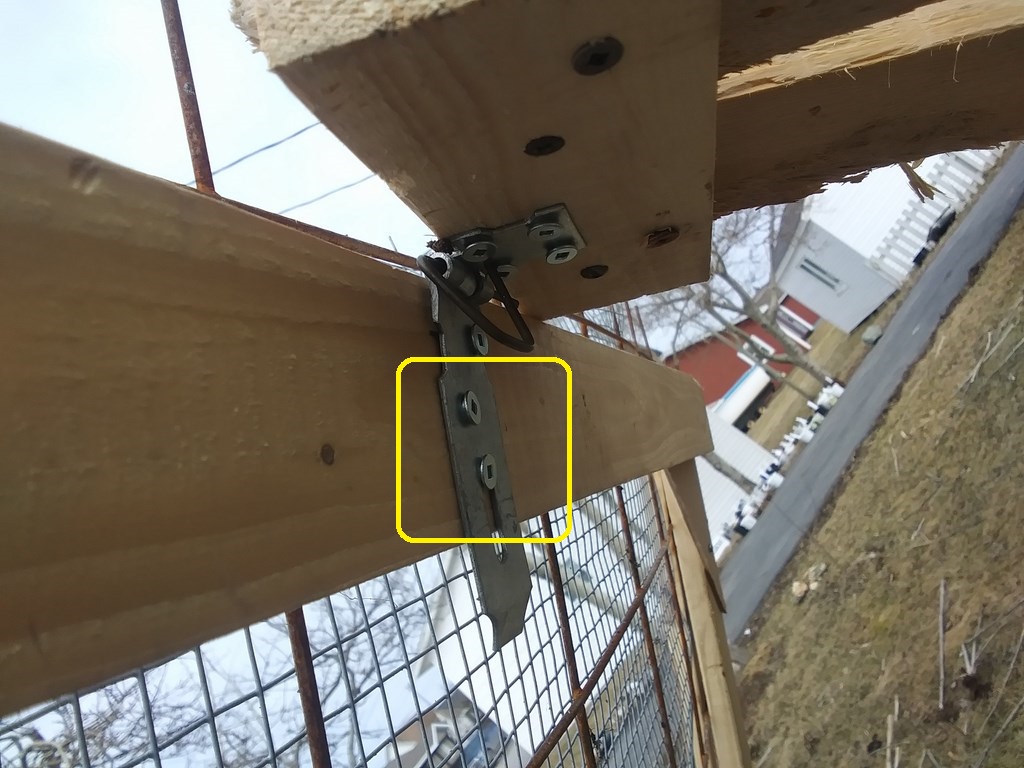
A close-up of the hinge, showing the two new screw-holes, all bolted together with the drop-pin.
The chute is hooked higher up the base so that tubers can fall into the barrow-tray. The mat is hooked over two extruding pieces of the construction mesh.
The barrow-tray holds artichoke tubers AND soil, but that can be easily sieved out; the bulk of the soil has fallen back on the bed.
I chopped of stalks close to the base, then dug out the stalks and tossed everything onto the mat.
A coarser mat might have worked, but right now I am interested in carting the sieve around and seeing if everything holds together.
I spread the prop as far back to the house as I could to use a shallower slope – around 45 degrees I think.
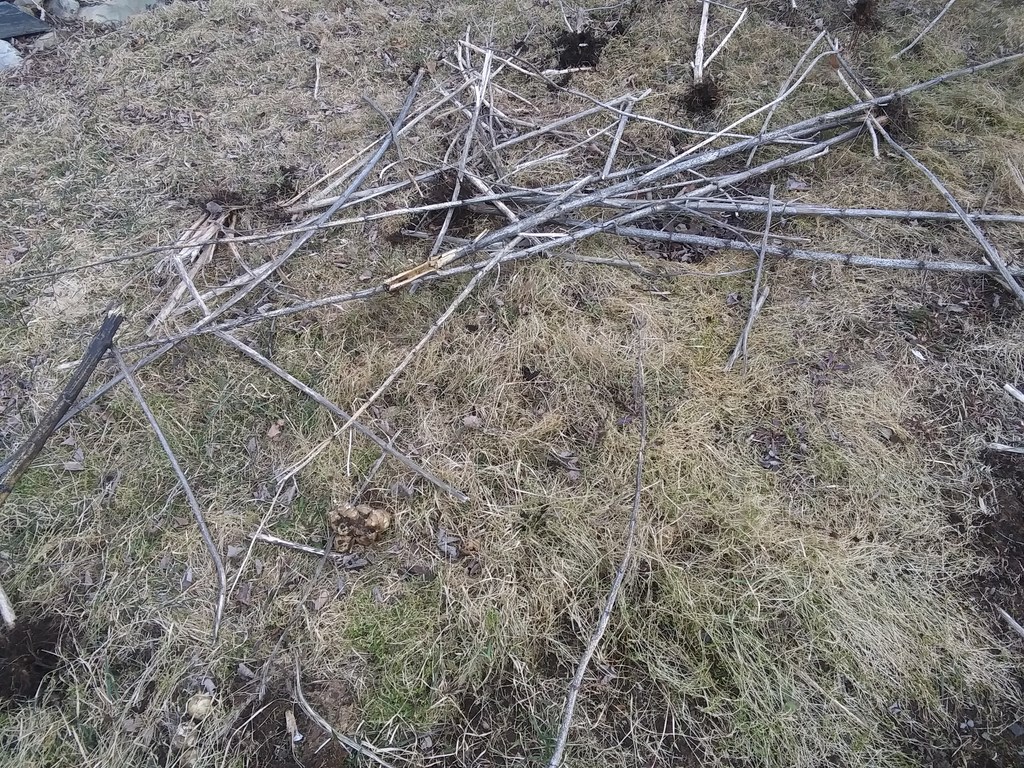
The pile of stacks can be raked, carted away, and burnt for their ashes, OR pushed into the new compost bins as they fill up with grass clippings. There they will provide airways and worm ways.
Sunday, April 07, 2024
Management Measures!
If you’re not measuring, then you’re not managing; and if you’re not managing, then your project is out of control.
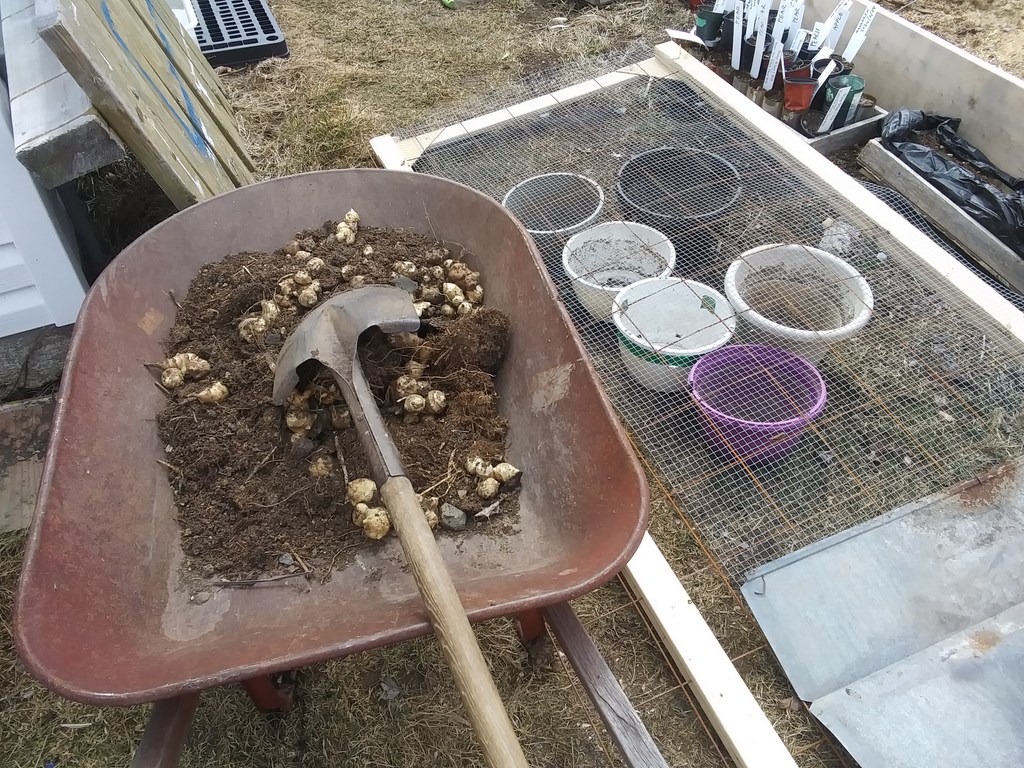
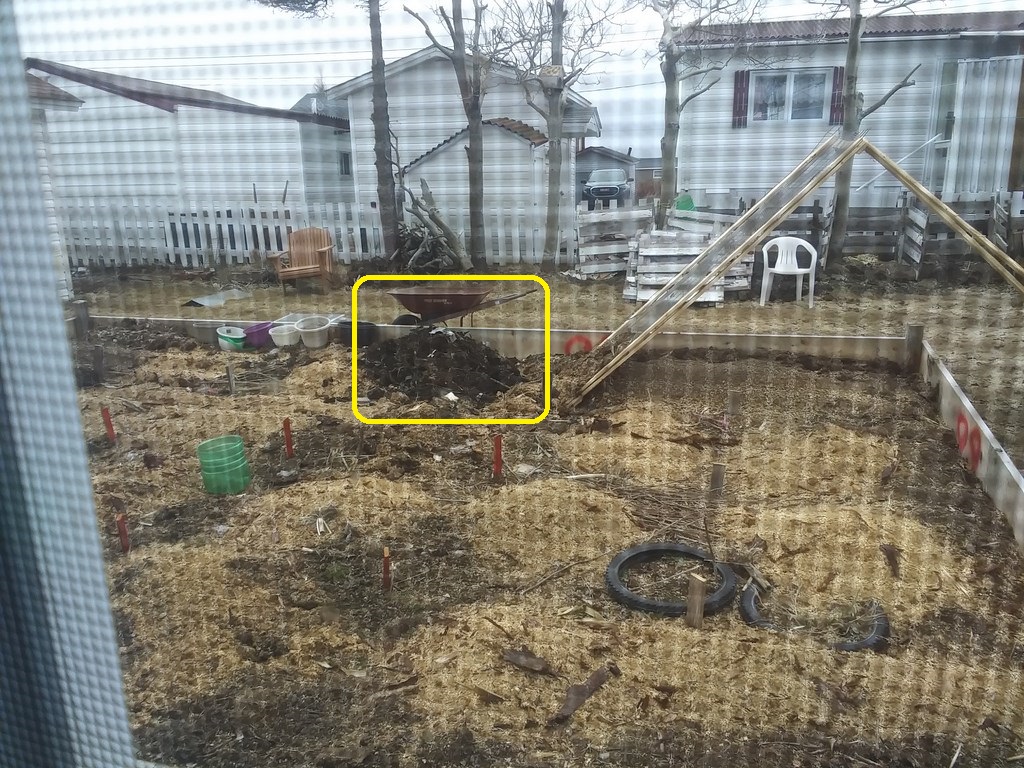
The barrow holds the results of yesterday evening’s digging-out of artichokes.
The rack is on its way from the driveway plot to the raised bed. Right now the rack is resting horizontally on a half-dozen hanging baskets.
I toss the barrow contents onto the rack and retrieve the artichoke tubers. The soil has fallen through the rack and, mostly, into the baskets.
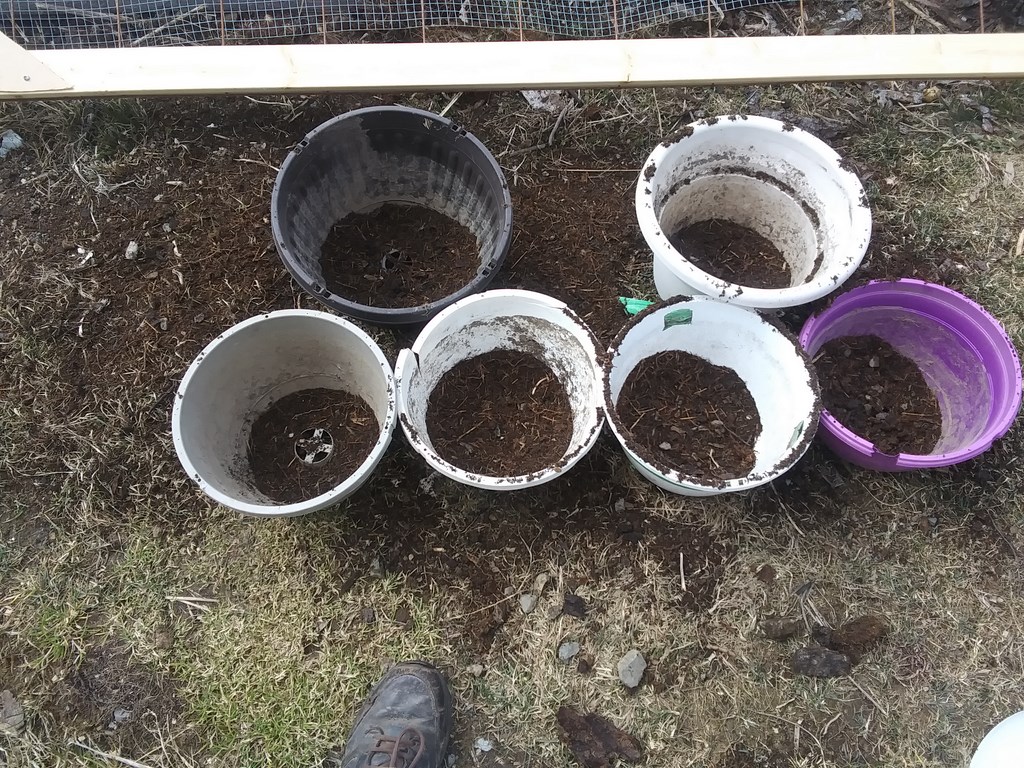
I can now rate the hanging baskets (quarter-full, half-full, …) and measure the distribution of soil falling through the rack.
All this to show you a way to measure, digitally, the result area of screening soil material.
Once the rack is back at work in the raised bed, a set of cans, or sawn-off water bottles would work as well to get a picture of where the material is landing.
Armed with that data I can better design a chute to suspend below the rack to funnel sieves soil into a container – for example a wheel-barrow.
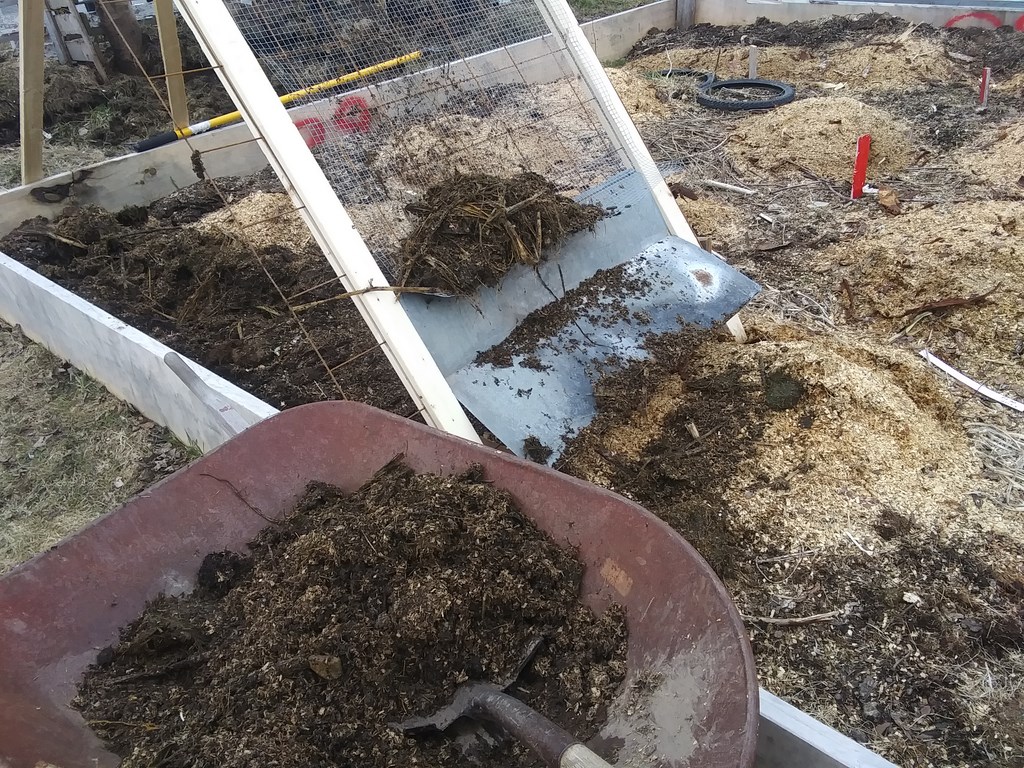
The clump of soil has lodged atop the gap between the sheet of metal and the mat. Within a minute, a dozen shovels of material will have caused a dam to form, preventing coarse material from dropping away from the mat.
I need a way to hold the lip of this chute hard up against the mat, instead of falling away to leave a two-inch gap.
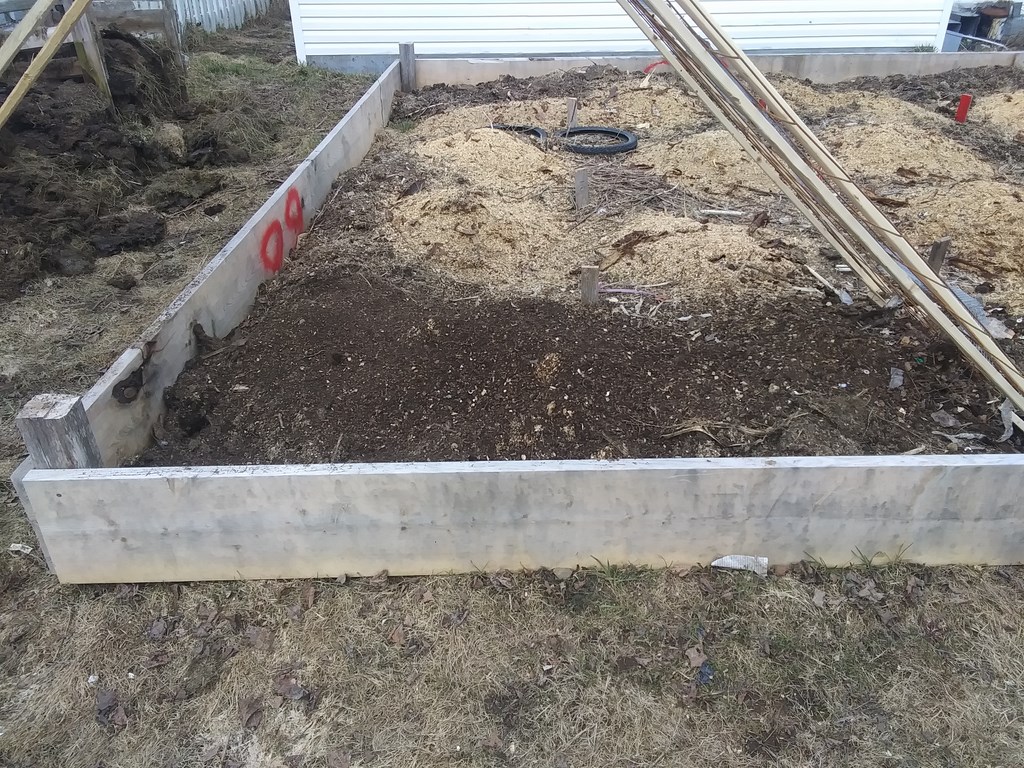
That said, here is a neat pile of soil.
Do not be fooled; this is really a veneer of sifted soil atop the unprocessed garden bed.
Still it looks impressive.
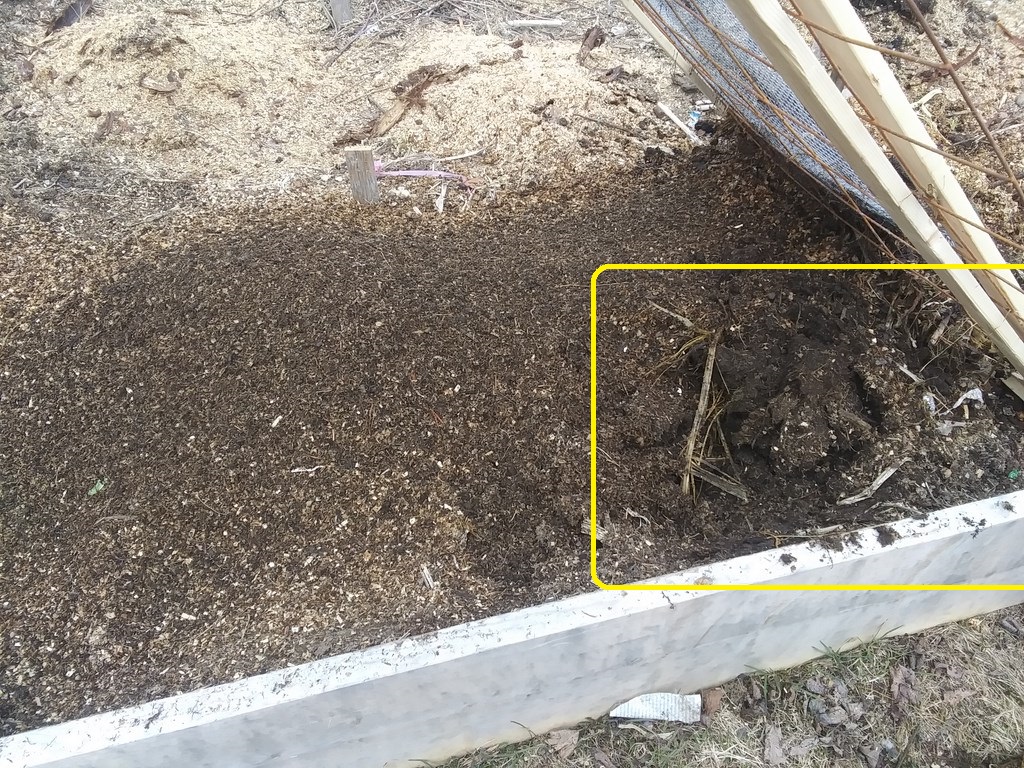
Coarse material is evident near the mat. That is because I had not properly emptied this first receiving bay.
A mass of material at the foot of the chute. The soil here is still too wet, and clumpy. There was a mass of material on the mat, so I tapped the mat gently with the shovel (vibrating rack), which caused the mass to sieve itself and slide to the bottom.
Roll on the vibrating rack.
On my way out of the yard, note the top-dressing on a small patch of yard that always collects rain- or melt-water. This year I can fill in that area, which is heavily traveled, and promote growth of healthy grass.
Monday, April 08, 2024
My goal right now is to fill the raised bed.
To that end I should be sieving as much loose soil as possible, not only in the bed, but from all other sources.
(1) Raised bed
(2) Compost Bins
(3) Shed Southern
(4) Shed Northern
(5) Driveway Western
(6) Driveway Eastern
(7) Driveway
(8) Davey’s pile of rotted sticks, if he will let me have it.
In this month’s Diary I identified eight sources of soil material that can be sieved. I should barrow (2) through (7) into the raised bed and pass it through the sieve. By all means start sieving what is IN the bed, but as well as part of the yard tidy-up, barrow all loose soil to the raised bed sieving machine. Even loose soil from the driveway bed; after all, that can be easily rebuilt from Gary Marsden’s grass clippings.
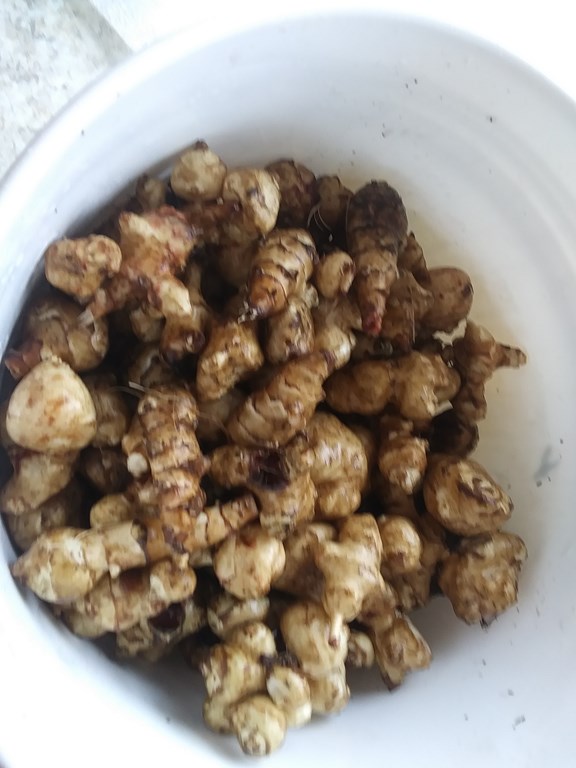
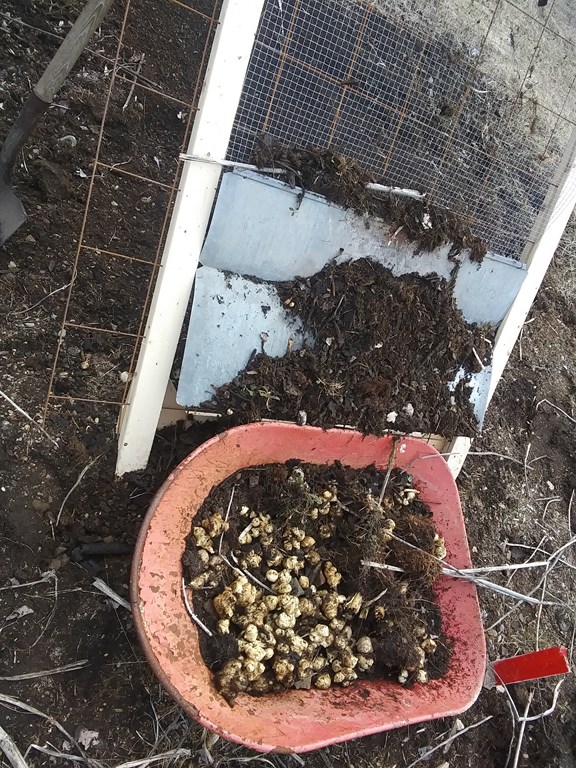
This first propped rack helped me to harvest a pail of artichokes. Here they have been soaked in water for five minutes to loosen the soil, then returned to the pail. Now they will have two cycles on ‘delicates” to agitate out the rest of the grit.
Three barrows load of composted kitchen scraps waiting to be passed through the rack. While this bit of compost will land in one spot, it will gradually be mixed and spread across the raised bed.
Tomorrow: all soil materials at the northern end of the shed.
Thursday, May 16, 2024
Moving the rack around for small jobs is not easy. The mesh and the steel chute, although hooked on with simple s-hooks, catch and grab on items as I lug the rack and prop around the yard.
I have to lay the piece flat to be able to loop the mat over the end of the construction mesh.
Slipping 1-cm mesh over the construction mesh is tricky. I need a netter method.
Perhaps cup-hooks screwed into the rack frame? Perhaps a wooden batten fixed across the top end of the mat, with two large holes drilled into the batten?
Tuesday, May 28, 2024
At the southern end of the shed, space is limited.
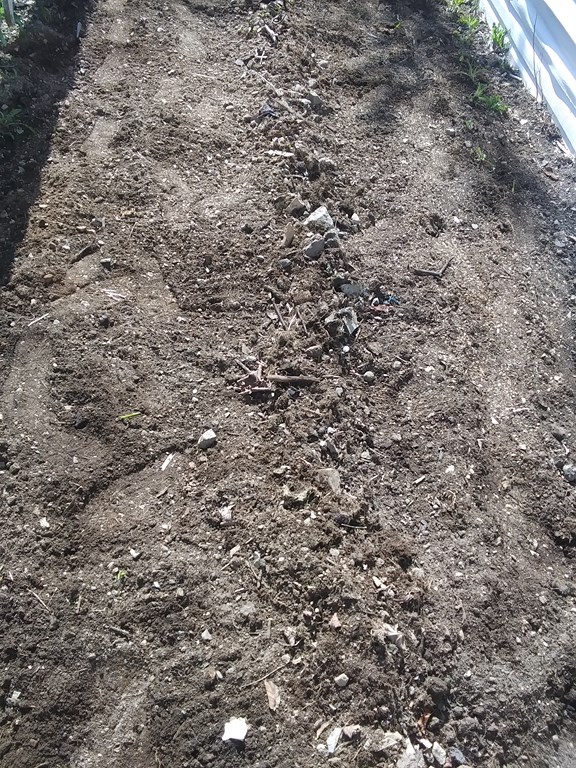
I have raked in from each side to the centre a collection of rocks, sticks, and soil. A windrow, if you will.
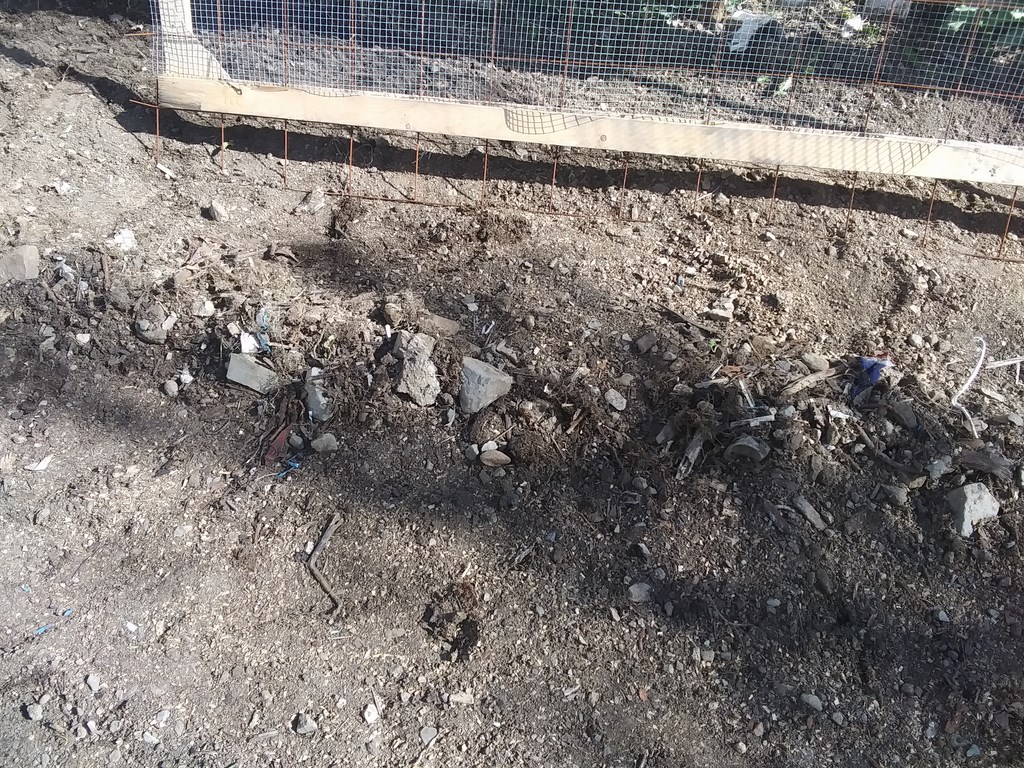
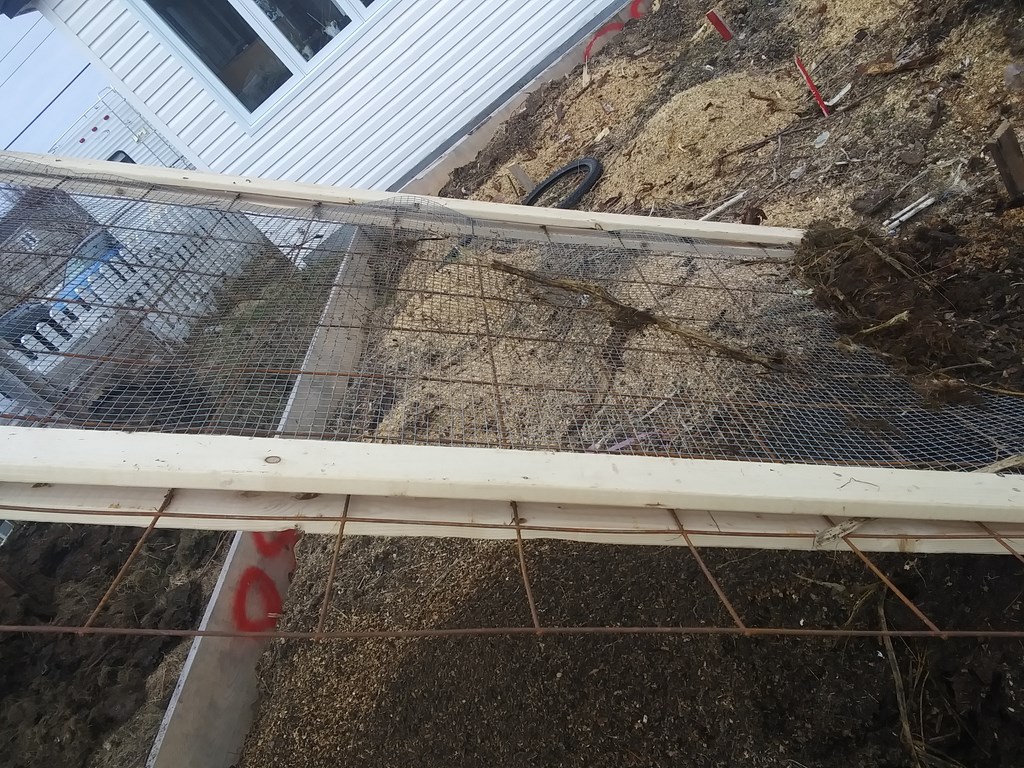
I try leaning the rack along the fence and toss a couple of shovels. The line of source is just ahead of the side of the mat.
This is not enough distance to separate the rocks from the source.
I cannot lower the slope, from either side of my windrow, without confusing the rocky output with the mixed source.
Right now the best use seems to be using the racked propped to give descending soil the maximum scope to fall through the mat.
Oh well, it was worth a try.
Thursday, May 30, 2024
I converted the triangular prop to rectangular, and used two door hinges. The pins do not yet drop out freely, so the complete kit is the maximum weight for me to maneuver around the hard.
I keep forgetting to adjust the slope:-
(1) Set up the rack, propped at sixty-degrees from the horizontal
(2) Toss three shovels and decide whether the slop might be less, or more, and still separate the fine from the course
(3) Adjust the legs by one or two feet horizontally and repeat with three more shovels.
Saturday, August 03, 2024
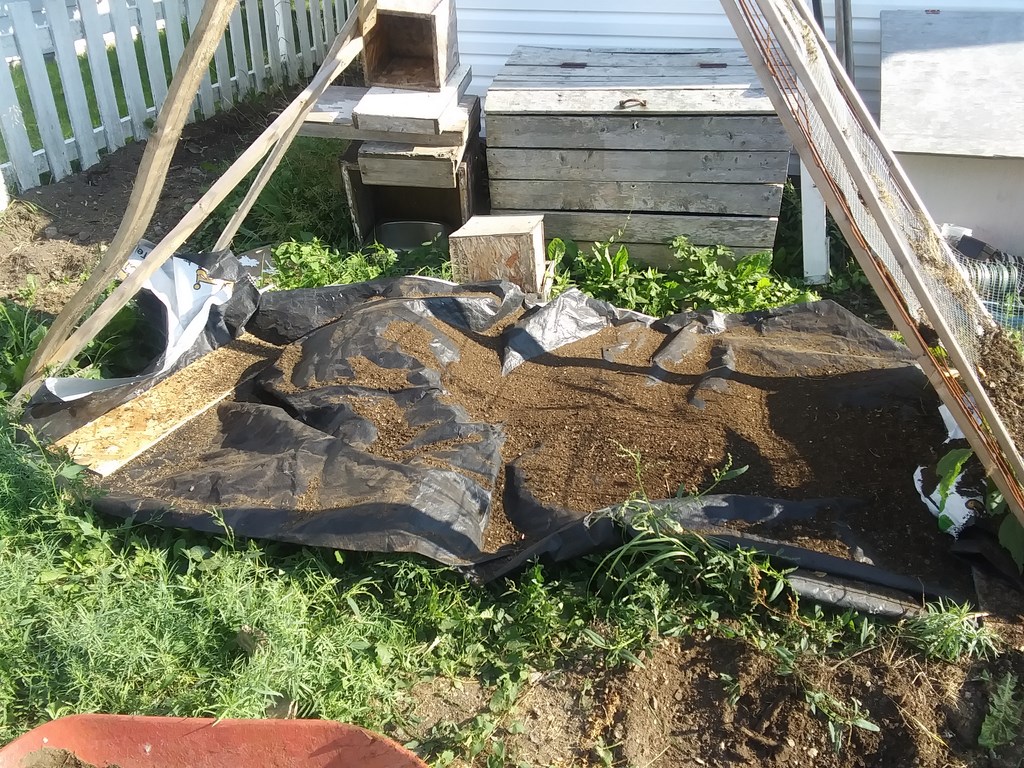
I had used an old barrow to collect the bulk of the sieved soil, but now have laid down old sheets of lumber-wrap, with a plank at each end. As I work through the timber in the shed (tomorrow?) I will add more baulks to hold down the edges of the tarp.
The theory is that I can tug up the edges of the tarp then shovel the sieved soil into serious containers.
Sunday, September 29, 2024
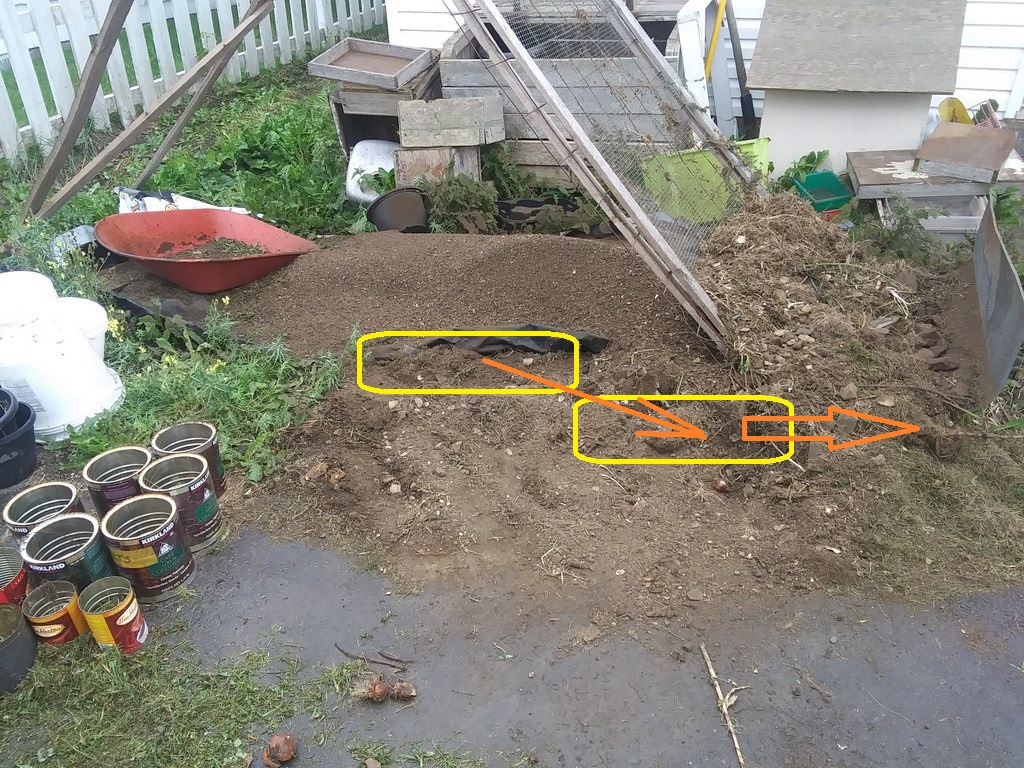
Notes for next year. When this year’s sieving is complete, I should roll the tarp off the site and rotary-hoe the area, rake out rocks, and leave a relatively smooth place for the tarpaulin. This year, as a trial I just threw the tarp over a bed of weeds, which has left a clumpy lumpy base to the tarp, difficult to scrape it clean.
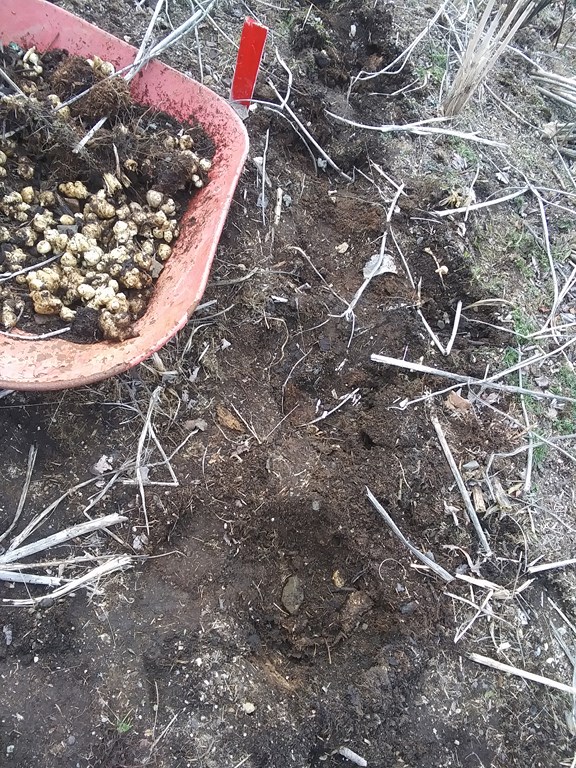
Furthermore, the best place to drop off material is NOT alongside the sieve, but near the foot of the sieve. I am right-handed and with the material at the tip of the orange arrow, I can shovel onto the mat without my shovel catching on the edge of the mesh.
Friday, October 04, 2024
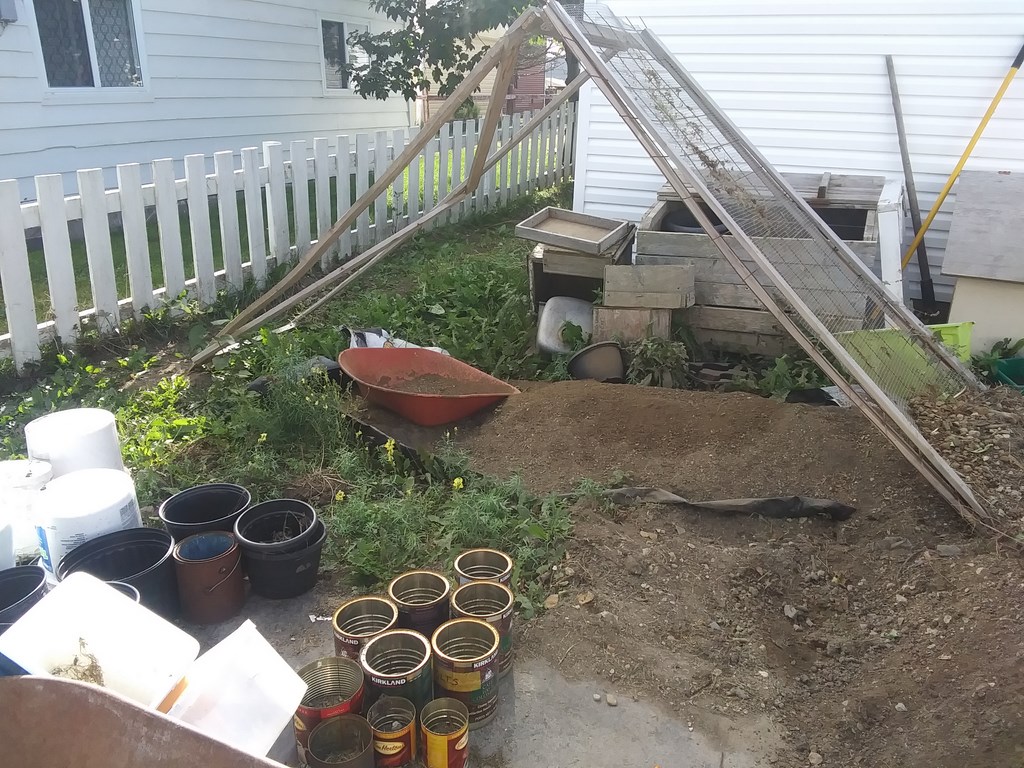
I spent twenty minutes sieving six barrow-loads of soil from the western trench. I found that the soil was dry enough to sieve and extended the legs (made the sieve slope more shallow) by a couple of feet; this delivered more soil below the sieve and a purer scree at the foot of the sieve.
In this image only two barrow-loads remain.
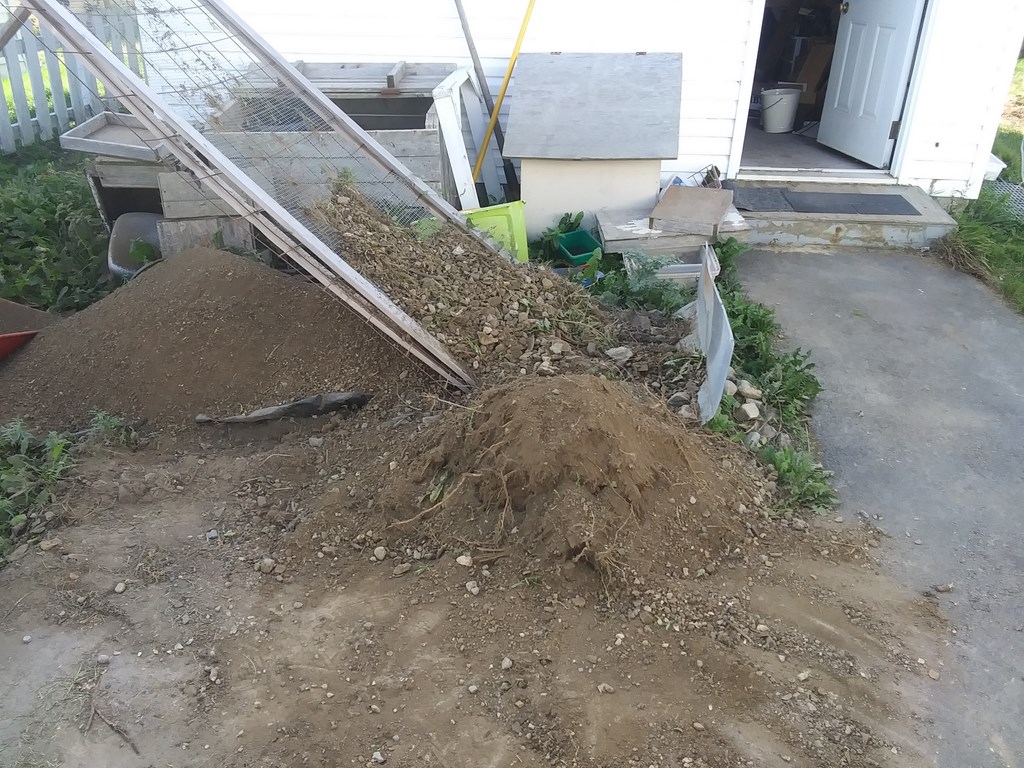
Look at the scree at the foot of the rack. How to remove it? To date I have been shoveling it away, but I start to wish I had a cable attached to the top of the rack, so that I could (pulleys!) pull the top over and past the pile of scree. That would free up more of the mat for sieving.
Alternatively I could raise the foot of the sieve to allow enough scree to fall off the mat onto the ground.
Ultimately the scree would pile up again and occupy the mat, but in practical terms I should barrow away the scree once the pile reaches up to the elevated foot of the rack.
Wednesday, April 23, 2025
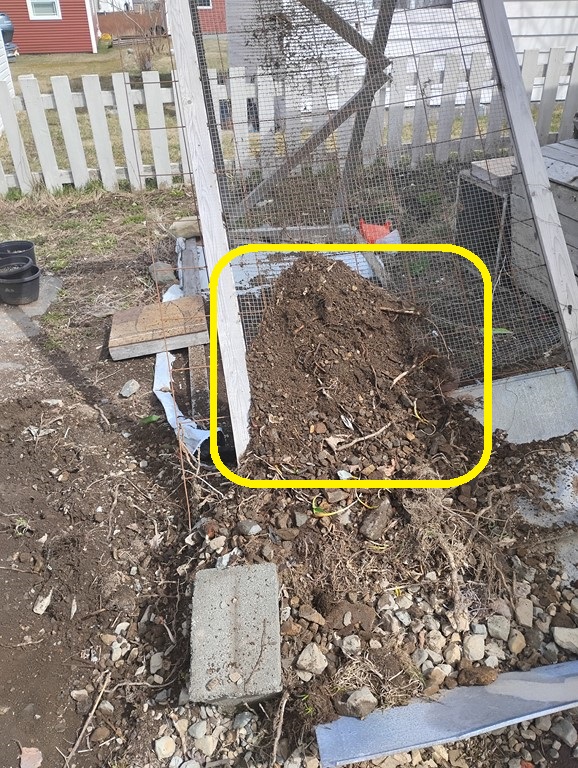
A pile of soil has accumulated at the foot of the screen. I shovel it back to the top and extract another half-foot of soil in the process. The scree will be barrowed over to David’s swamp tomorrow, weather permitting.